Nokia N95 8GB disassembly
Nokia N95 8GB disassembly
Nokia N95 8GB disassembly

Create successful ePaper yourself
Turn your PDF publications into a flip-book with our unique Google optimized e-Paper software.
<strong>Nokia</strong> <strong>N95</strong> <strong>8GB</strong> <strong>disassembly</strong><br />
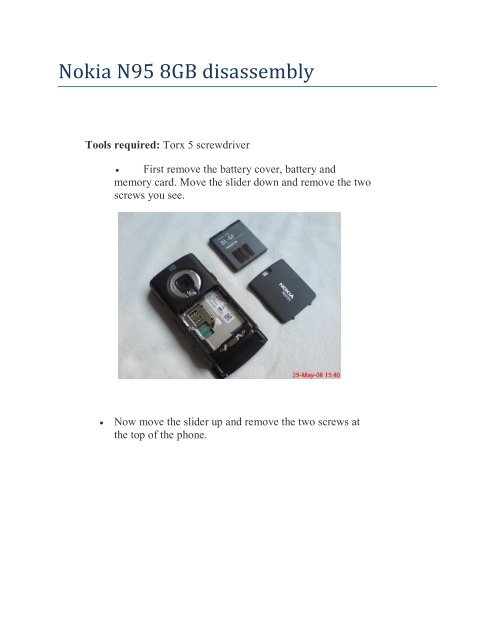
Tools required: Torx 5 screwdriver<br />
� First remove the battery cover, battery and<br />
memory card. Move the slider down and remove the two<br />
screws you see.<br />
� Now move the slider up and remove the two screws at<br />
the top of the phone.
� Run your fingernail along the edge of the join of the<br />
front cover to unclip it.<br />
� You should now have the front cover removed. The
keypad should be loose as well.<br />
� Flip the keypad part back to access the ribbon which<br />
connects the LCD to the phone.<br />
� The screen is attached to the circuit board by a ribbon<br />
(indicated below by the screwdriver) which attaches like<br />
a plug and socket. Simply lift the connector up to unplug<br />
it.
� Lift the screen away from the rest of the phone. Your<br />
phone should look like below and you can replace the<br />
LCD. Reverse the whole procedure for reassembly<br />
If you have any questions about <strong>Nokia</strong> <strong>N95</strong> <strong>8GB</strong><br />
sales@mobilepros.com.au<br />
Thank you.